As I told you recently, I bought a 3D printer. I really like it, but what I enjoy even more is hacking it! In this article, I’ll explain how I made my Creality Ender 3 V3 SE controllable over WiFi with OctoPrint.
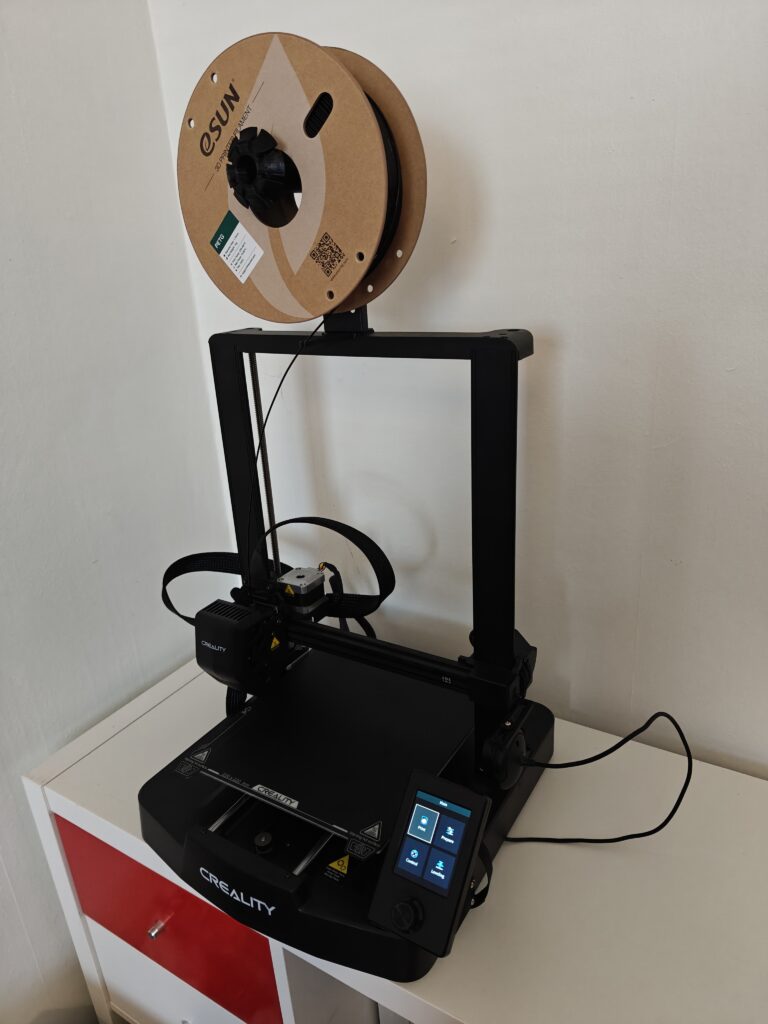
OctoPrint is installed on a Raspberry Pi 3B+, which has its root filesystem read-only. It means that it’s not needed to gracefully shut it down anymore. In addition, I’ve hidden the Raspberry inside the printer and powered it from the main power supply, making it completely invisible. The printer really seems wireless from the factory!
Table of contents:
What is OctoPrint
OctoPrint is an open-source project making easy to control your 3D printer over WiFi. It runs on Linux systems and doesn’t need a very powerful PC, making it perfect to run on a single-board computer such as a Raspberry Pi.
With OctoPrint, you can upload GCode to your printer and start the print without moving from your chair! Even more than that, it’s possible to connect a webcam to record timelapses of your prints and check if something wrong is happening. OctoPrint is very modular, so you can improve it with tons of community plugins and themes. Your imagination is the limit! A feature I really appreciate is being able to trigger a shell command at particular moments, such as startup and print end. I used this feature to send a notification to my phone when the print is done.
Required parts
- Raspberry Pi. I used a 3B+
- Micro-SD card. Mine is 8GB
- 3D Printer. Such as my Creality Ender 3 V3 SE
- WebCam (optional)
- Cut USB A cable
- Cut USB Micro B cable
- 24V to 5V@2A power supply
- Zip ties
- Double sided tape
Disclaimer: This guide is quite advanced, feed free to contact me if some parts are unclear!
Software set up
Before doing some hardware hacking, let’s set the Raspberry Pi up.
Setup the Raspberry
The very first step is to install an OS for your Raspberry Pi. I recommended the latest OctoPi image, which can be easily installed with the Raspberry Pi Imager way.
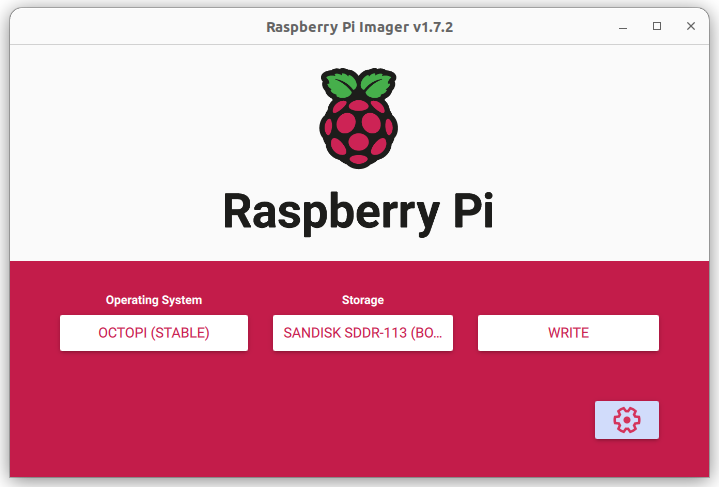

Make sure to configure properly the hostname, username, password, keyboard layout, locale, SSH and WiFi network. Again, follow the official guide! When it’s flashed, Insert the SD card into you Pi, check that it boots properly then shut it down.
Add one more partition
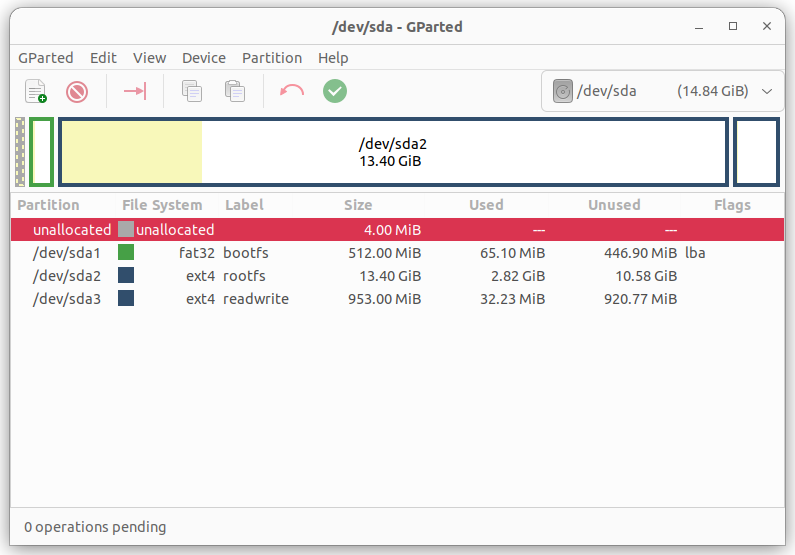
When your Raspberry’s filesystem will be fully read-only, you’ll still need to upload files to your OctoPrint instance. A solution to this is to add a third partition to the SD card (boot, root and readwrite). To do so, insert the SD card into your PC and use your favorite software to reduce the root partition enough to make space for the future readwrite partition. Then, create the readwrite partition as an ext4 filesystem. I used GParted on Ubuntu. You can see below how the SD card looks when it’s finished.
After putting the memory card back in the Pi and powering it up, it should boot. Connect to it via SSH and check that all partitions are visible with the fdisk command. You should see something similar to this.
octopi@octopi:~ $ sudo fdisk -l
...
...
Disk /dev/mmcblk0: 14.84 GiB, 15931539456 bytes, 31116288 sectors
Units: sectors of 1 * 512 = 512 bytes
Sector size (logical/physical): 512 bytes / 512 bytes
I/O size (minimum/optimal): 512 bytes / 512 bytes
Disklabel type: dos
Disk identifier: 0x7ea39915

Device         Boot    Start      End  Sectors  Size Id Type
/dev/mmcblk0p1          8192  1056767  1048576  512M  c W95 FAT32 (LBA)
/dev/mmcblk0p2       1056768 29163519 28106752 13.4G 83 Linux
/dev/mmcblk0p3      29163520 31115263  1951744  953M 83 Linux
Automatically mounting the readwrite partition
Now that the readwrite partition exists, we would like it to be mounted at boot. Nothing easier, let’s edit /etc/fstab and so it looks this way:
proc                  /proc           proc    defaults          0      0

PARTUUID=<uuid>-01  /boot/firmware  vfat    defaults          0      2
PARTUUID=<uuid>-02  /               ext4    defaults,noatime  0      1
PARTUUID=<uuid>-03  /readwrite      ext4    defaults,noatime  0      1
Save and reboot. Now you should have the mountpoint /readwrite available!
octopi@octopi:~ $ mount
...
/dev/mmcblk0p2 on / type ext4 (rw,noatime)
...
/dev/mmcblk0p1 on /boot/firmware type vfat (rw,relatime,fmask=0022,dmask=0022,codepage=437,iocharset=ascii,shortname=mixed,errors=remount-ro)
/dev/mmcblk0p3 on /readwrite type ext4 (rw,noatime)
...
Update the OS
Now, it’s time to update the system with the well-known
sudo apt-get update && sudo apt-get dist-upgrade -y
sudo apt-get autoremove -y
Making OctoPrint ready
OctoPrint would work directly, but here we want it to run on a read-only filesystem. First, the .octoprint directory, located in the user’s home folder which is /home/octopi has to be in the readwrite partition, as it’s where the GCode files will be uploaded. Since it’s not possible to set it somewhere else that the default, move it and create a symlink with
sudo systemctl stop octoprint.service
sudo mv /home/octopi/.octoprint /readwrite/.octoprint
sudo chown -R octopi:octopi /readwrite/.octoprint
ln -s /readwrite/.octoprint /home/octopi/.octoprint
On the other hand, we don’t want the logs to be written on the readwrite partition. Let’s link them to somewhere else:
rm -rf /home/octopi/.octoprint/logs
sudo ln -s /var/log/octoprint /home/octopi/.octoprint/logs
Now that everything will run fine, we need a modified systemd unit to make OctoPrint start at boot. You can do it by modifying the file /etc/systemd/system/octoprint.service to be as follows:
[Unit]
Description=The snappy web interface for your 3D printer
After=network.online.target
Wants=network.online.target
RequiresMountsFor=/readwrite/.octoprint

[Service]
Environment="HOST=127.0.0.1"
Environment="PORT=5000"
Type=simple
User=root
ExecStart=/home/octopi/start-octoprint-ro.sh --host=${HOST} --port=${PORT}

[Install]
WantedBy=multi-user.target
As you notice, it will call a custom script start-octoprint-ro.sh that should be created in /home/octopi, with the following contents:
#!/bin/bash

mkdir -p /var/log/octoprint
chown -R octopi:octopi /var/log/octoprint

sudo -u octopi /home/octopi/oprint/bin/octoprint serve --host=${HOST} --port=${PORT}
This script first creates the octoprint directory in /var/log, sets the ownership to user octopi and finally starts octoprint. Make sure to set this script executable.
chmod +x /home/octopi/start-octoprint-ro.shNow you can enable the OctoPrint service, so it will start when the OS boots.
sudo systemctl daemon-reload
sudo systemctl enable octoprint.service
It’s also useful to allow your user to access the serial ports and cameras without root access. You can do this with the following commands:
sudo adduser octopi dialout
sudo adduser octopi tty
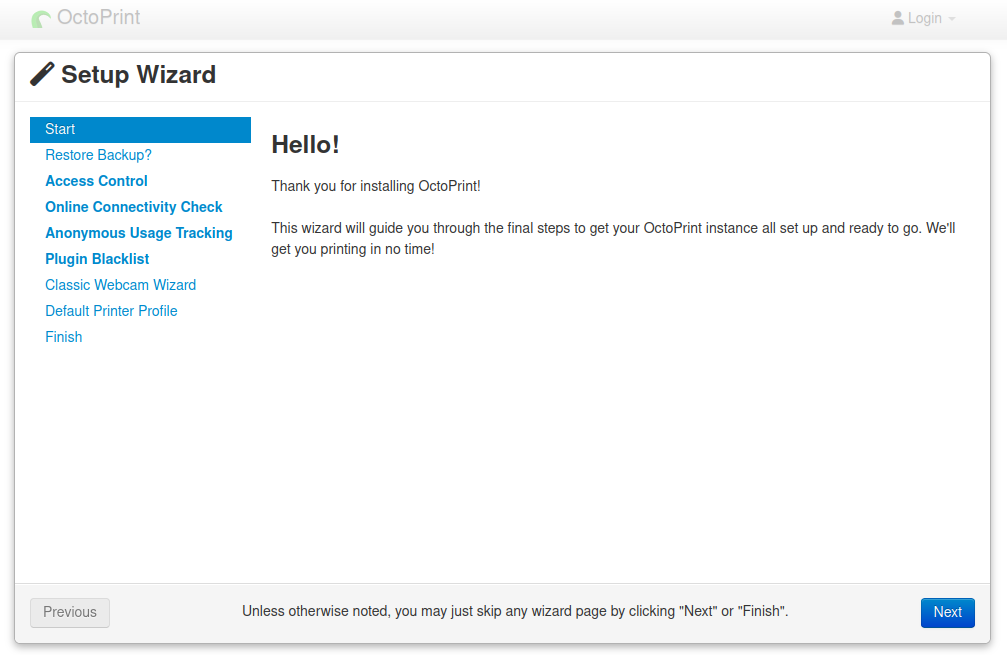
sudo adduser octopi videoNow, you can reboot the Raspberry and OctoPrint should be available in your PC’s browser at the Pi’s IP or hostname. You’ll normally see the first-run wizard. Follow it to the end.
Connect the 3D printer and webcam
Later, I’ll show you how I integrated the Raspberry Pi inside my 3D printer. But up to here, this tutorial is very generic and will work with any printer. What you can do now is to connect the printer and webcam with USB cables to you Pi. This way, you’ll be able to tweak and configure your OctoPrint installation and check that it works.
It’s also the right time to install and configure some extensions and plugins. Here are the ones I personally use and recommend:
- Camera settings
- Cancel objects
- Dashboard
- Exclude region
- PrettyGCode
- Resource monitor
- Slicer thumbnails
- UI Customizer
Finally, I suggest you to make a test print, to be sure that everything works now that the filesystem is still writable. It’ll be more difficult to make changes once it will be read-only.
Yes, my webcam’s quality is cheap, but I let you with a beautiful timelapse of a Magikarp!
Setting the read-only filesystem
Now it’s time to make your root and boot filesystems read-only. I learnt how to do this thanks to the very good article from Chris DZOMBAK. You can follow his tutorial, every step is interesting.
In addition, the fake-hwclock needs to write to a readwrite partition. You can follow another article from Chris DZOMBAK again, with the difference that you already have a readwrite partition: the one we created for OctoPrint. Then you can place the fake-hwclock.data file in /readwrite instead of /mnt/mut/….
To summarize, you will:
- Disable
- swap functionnality
- Boot-time filesystem checks
- Replace systemd-timesync by ntp
- Disable
- systemd-rfkill
- Automatic apt and mandb tasks
- Move to a temporary filesystem
- Some NetworkManager files
- random-seed
- Temporary folders
- Spool folders
- /var/log
- logrotate state
- sudo state
- Set your root and boot filesystems to boot read-only
- Create bash commands to switch between read-only and read-write
In the end, your /etc/fstab file will look like below:
proc            /proc           proc    defaults          0       0

PARTUUID=<uuid>-01  /boot           vfat    defaults,ro       0       2
PARTUUID=<uuid>-02  /               ext4    defaults,ro,noatime  0       1
PARTUUID=<uuid>-03  /readwrite      ext4    defaults,noatime  0       1

# a swapfile is not a swap partition, no line here
#   use  dphys-swapfile swap[on|off]  for that

# Tmp folders as tmpfs
tmpfs  /tmp      tmpfs  defaults,noatime,nosuid,nodev   0  0
tmpfs  /var/tmp  tmpfs  defaults,noatime,nosuid,nodev   0  0

# Spool on tmpfs
tmpfs  /var/spool/mail     tmpfs  defaults,noatime,nosuid,nodev,noexec,size=25m  0  0
tmpfs  /var/spool/rsyslog  tmpfs  defaults,noatime,nosuid,nodev,noexec,size=25m  0  0

# Var log on tmpfs
tmpfs  /var/log  tmpfs  defaults,noatime,nosuid,nodev,noexec,size=50m  0  0

# Logrotate on tmpfs
tmpfs  /var/lib/logrotate  tmpfs  defaults,noatime,nosuid,nodev,noexec,size=1m,mode=0755  0  0

# Sudo state to tmpfs
tmpfs  /var/lib/sudo  tmpfs  defaults,noatime,nosuid,nodev,noexec,size=1m,mode=0700  0  0
After a reboot, if you call the mount command, you will get this output.
/dev/mmcblk0p2 on / type ext4 (ro,noatime)
...
/dev/mmcblk0p3 on /readwrite type ext4 (rw,noatime)
/dev/mmcblk0p1 on /boot type vfat (ro,relatime,fmask=0022,dmask=0022,codepage=437,iocharset=ascii,shortname=mixed,errors=remount-ro)
...
I omitted many lines, but it proves that the root (/) and boot mount points are read-only, while readwrite is read-write.
Keep in mind that every change you’ll do on the filesystem or your OctoPrint instance when in read-only mode will be discarded at reboot (except your GCode uploads). Then, it’s wise to switch to read-write and restart OctoPrint service before doing such. On the other hand, using a read-only filesystem allows you to savagely unplug the Raspberry Pi without corrupting your filesystem.
Again, reboot and test your OctoPrint installation, it should still work fine!
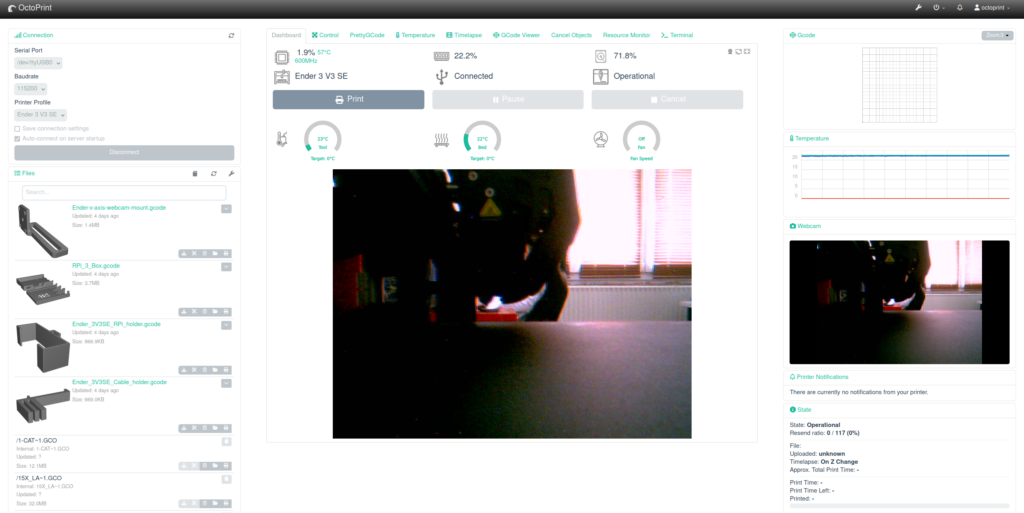
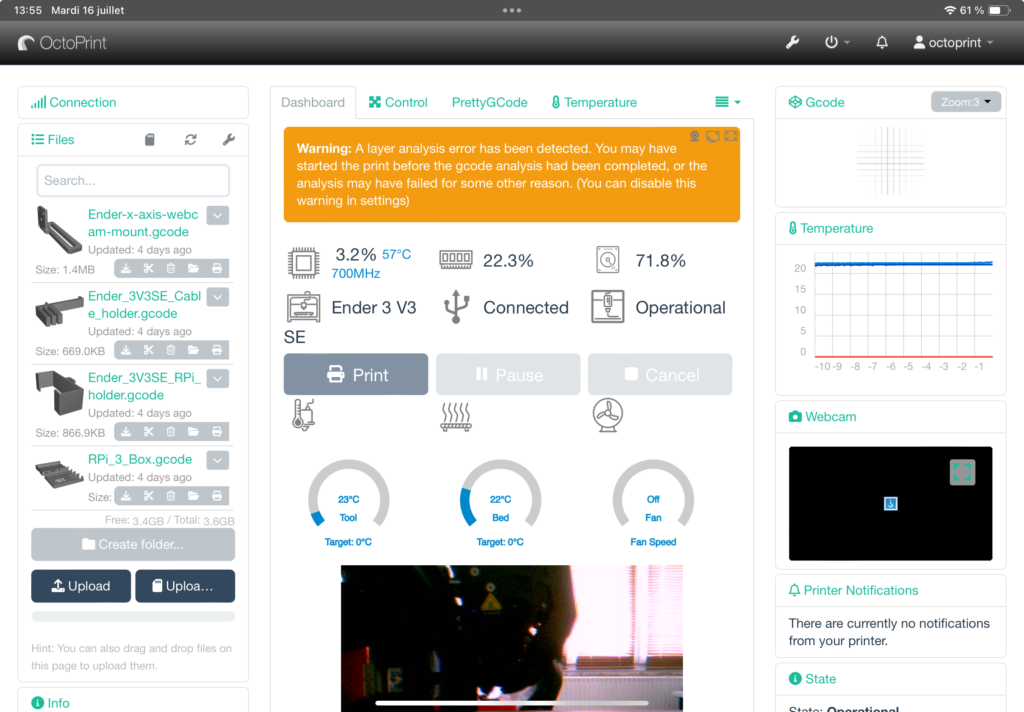
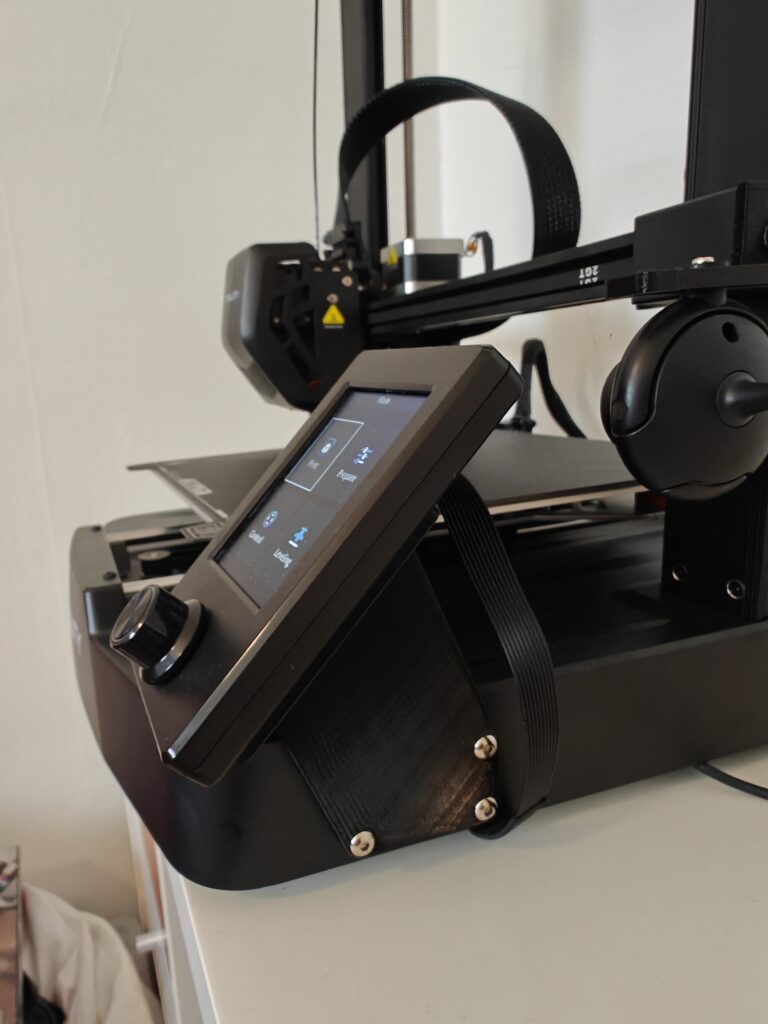
I like OctoPrint because I can use it on my PC and my iPad too. You can see below how my tuned web UI looks.
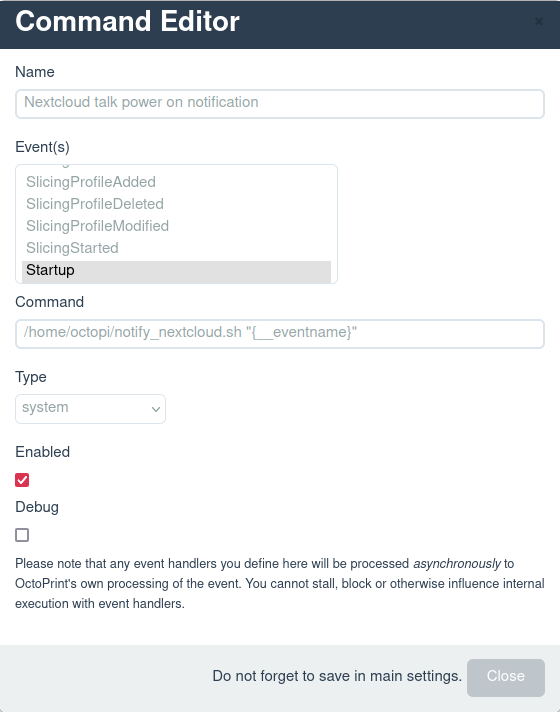
Sending notifications
A cool feature with OctoPrint is that you can easily trigger a script when an event happens. On my side, I use this functionality to send a Nextcloud Talk message to my phone when OctoPrint is ready or when a print is done.
You can configure this in the Settings > OctoPrint > EventManager menu.
Below is the script contents. Save it in the location you want (such as /home/octopi/notify_nextcloud.sh) and make sure that the user octopi can execute it.
#!/bin/bash
# Send a Nextcloud chat notification with date, time and event that occured
# BDeliers - 2024

# Get date and time
theDate=`date +"%d/%m/%Y"`
theTime=`date +"%H:%M:%S %Z"`

# Prepare message
messText="[OctoPrint] Printer event on $theDate at $theTime.\nEvent ${1} happened."

# Server values
user="<myUser>"
pass="<userPassword>"
room="<roomCode>"
apiUrl="https://www.<netxcloud url>/ocs/v2.php/apps/spreed/api/v1/chat"

# Make the notification
curl -k -s -H "Content-Type: application/json" -H "Accept: application/json" -H "OCS-APIRequest: true" -u "$user:$pass" -d '{"token":"'"$room"'", "message":"'"$messText"'"}' "$apiUrl/$room" > /dev/null
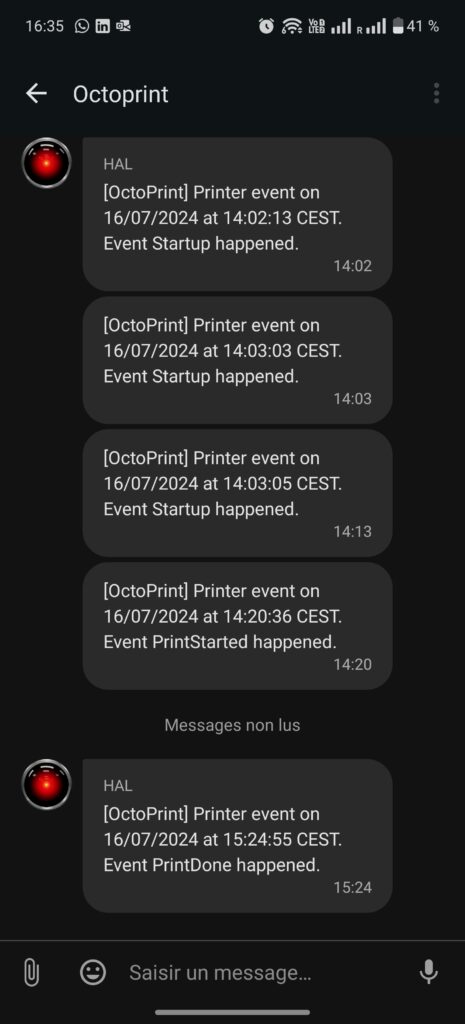
Below is how my Nextcloud Talk conversation looks on my phone.
Integrating OctoPrint with Cura
Send to OctoPrint
Even cooler, if you use Ultimaker Cura slicer, you can send your GCode directly to OctoPrint without having to upload it manually through the GUI.
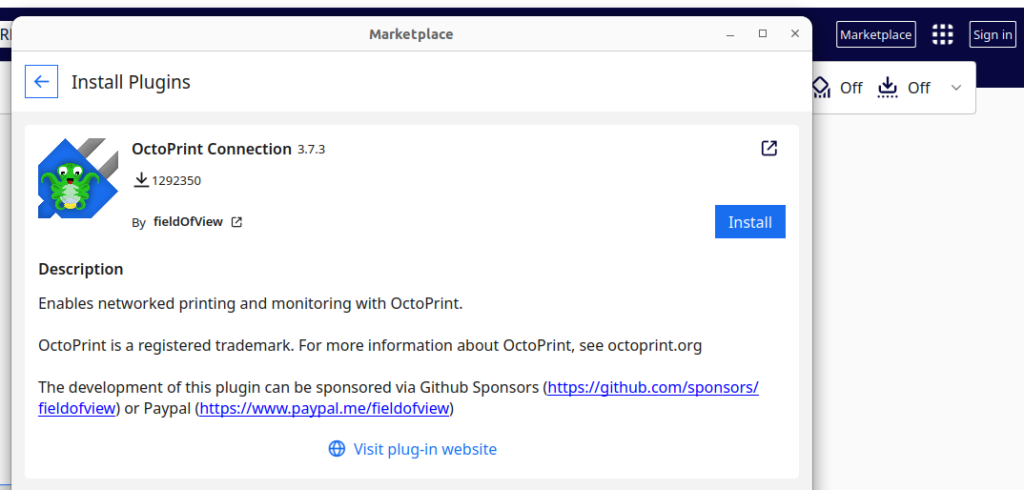
First step is to install the OctoPrint Connection plug-in from the Cura marketplace.
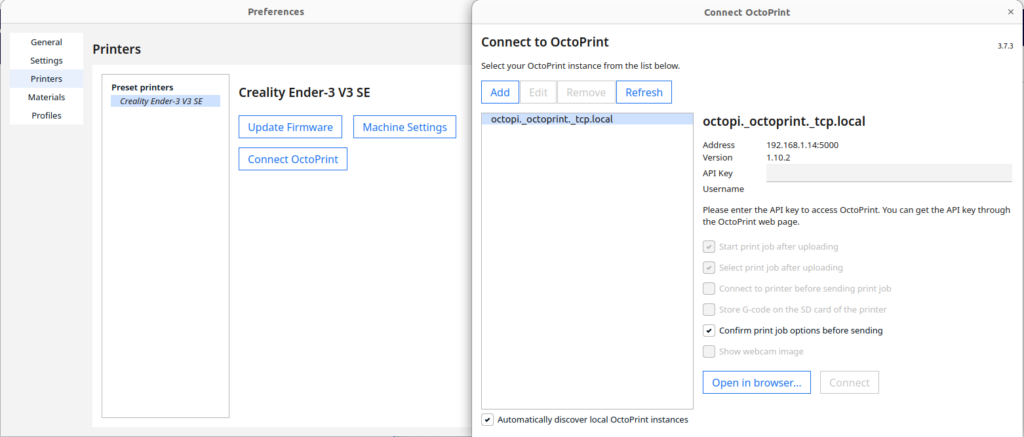
Then restart Cura and configure your OctoPrint instance in Settings > Printers > Manage Printers > Your printer > Connect OctoPrint. The API Key can be generated with the OctoPrint web GUI in the Settings > Features > Applications Keys. Remember to switch your Raspberry to read-write, otherwise the API key won’t be saved!
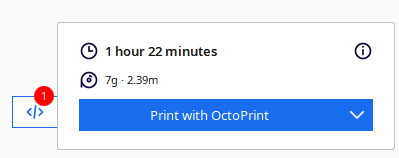
Now, you’ll see the “Send to OctoPrint” option directly after slicing!
Generating thumbnails
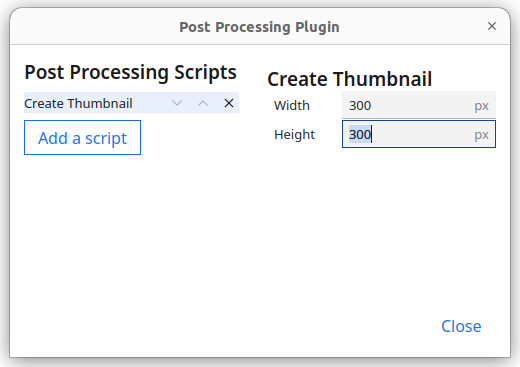
If you installed the Slicer thumbnails extension to OctoPrint, you’ll notice that no thumbnail is available. It’s because you must generate it in your slicer, it’s not here by default. In Cura, you can do it with a post-processing script.
Enable this script in the menu Extensions > Post Processing Scripts > Modify GCode > Add a script > Create Thumbnail.
Hacking the printer
The beast’s inside
As I told at the beginning of the article, the funniest part for me was to hack my printer. Indeed, I knew that there is many free-space inside the Ender 3 V3 SE’s body.
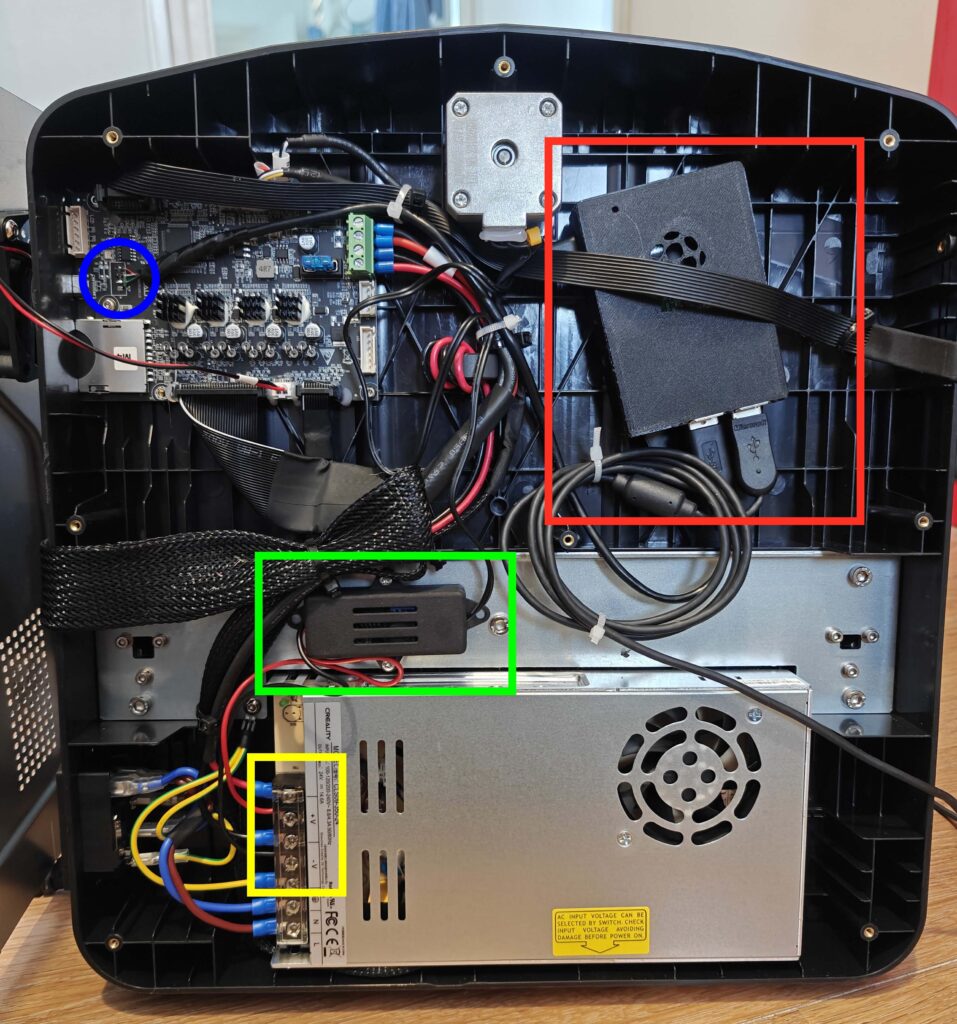
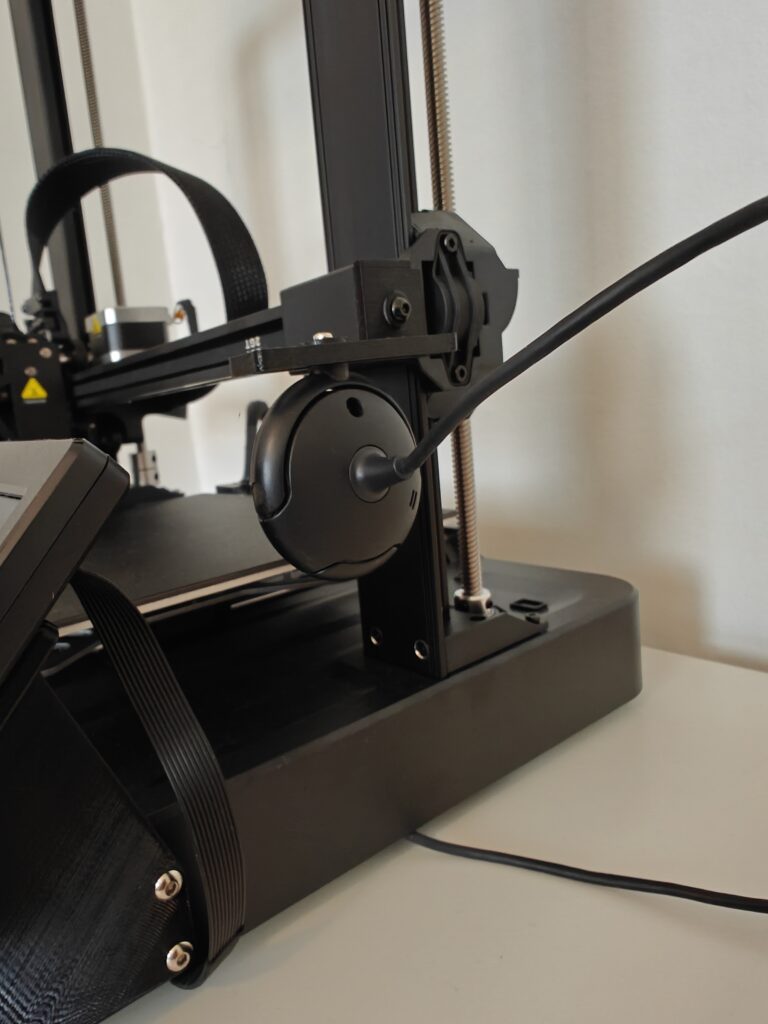
Even better, the printer is powered by a 24V power supply which has free outputs! I connected a Buck converter to make 5V from it (the Raspberry needs 5V@~2A) and connected it to the micro-USB power plug of the Raspberry Pi.

Another luck is that the connector J6 of the printer’s main board is a mirror of the main serial port available outside. I soldered a USB cable to it (red square) and plugged the other side in the Raspberry Pi.
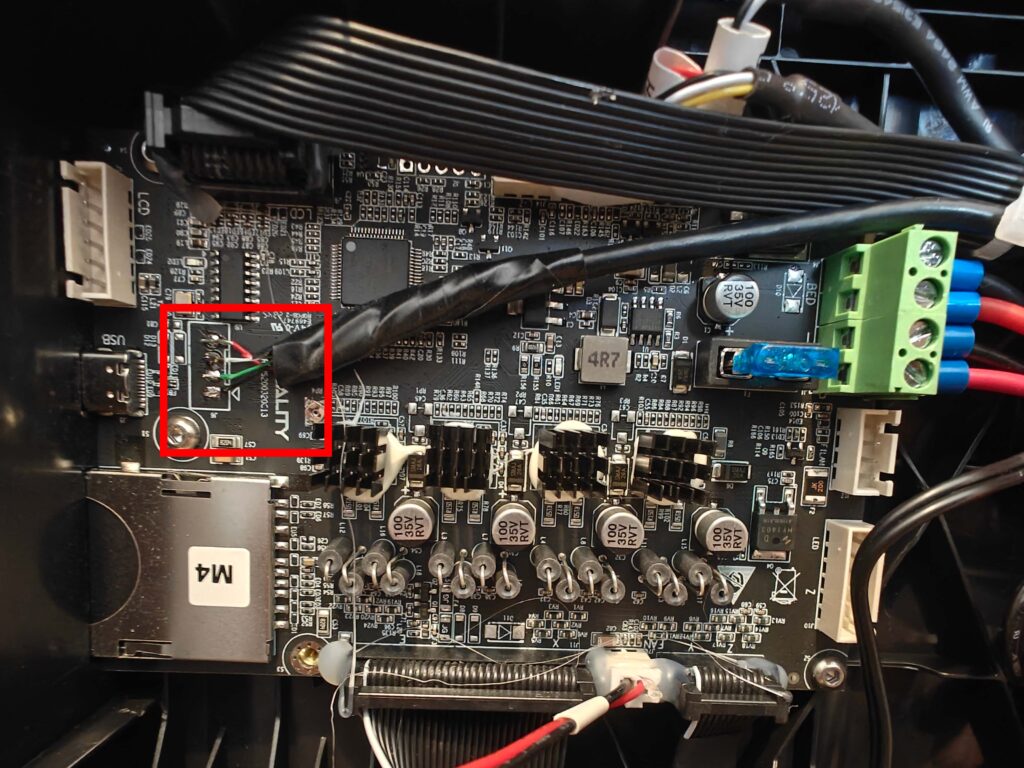
On the picture below, we see the buck power supply (green) connected to the main PSU (yellow), the USB cable from the mainboard’s socket (blue) to the Raspberry Pi (red).
Finally, some zip ties and double-sided tape made everything fit inside the case. Don’t forget to plug the Webcam, then close the printer’s belly!
Now, when you’ll power on the printer, OctoPrint on the Raspberry Pi will start automatically. If you configured notifications, you’ll be informed when it’s ready to operate. When you power off the printer, the Raspberry will stop, and it won’t be a problem as the filesystem is read-only. It won’t corrupt!
One more level of over-engineering
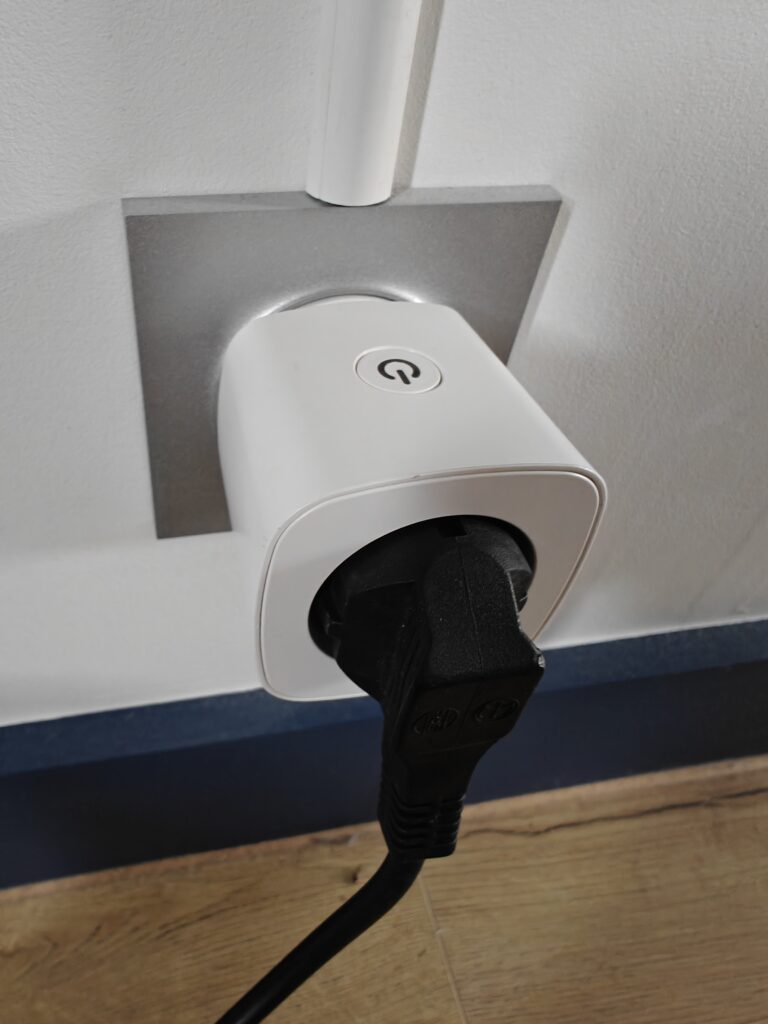
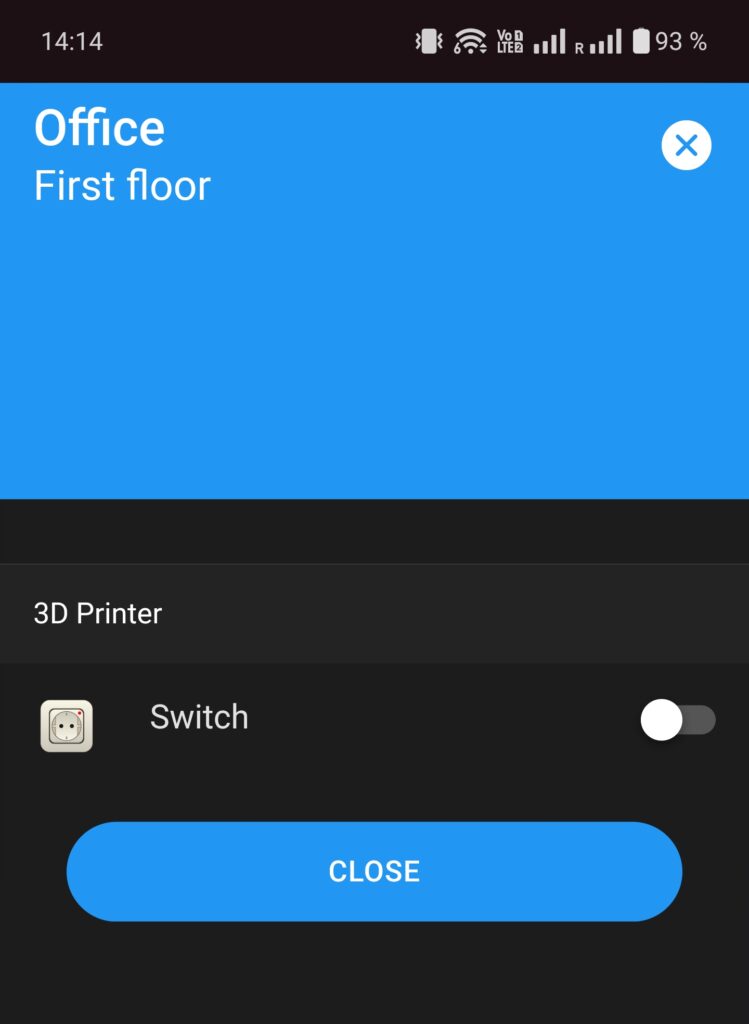
Let’s summarize we have a 3D printer and it’s now WiFi controlled. The last step to make it fully hands-off is to power it on and off without touching the main switch! That’s what I did, simply by plugging it onto a wireless controlled plug. The plugs is integrated in my OpenHab smart home ecosystem, so I can switch it from my phone. Smart or lazy, I let you decide!
Modding the printer
The first use of a 3D printer (to me, at least) is to mod it to make it easier to use. Here is a list of mods I added to mine. All of this was printed with black PETG, to make it look stock. Thanks for all the people who shared these awesome designs!


Conclusion
Wow, this was a log and technical one! I don’t pretend that I created or invented everything I shown or explained in this article, but I hope that wrapping everything together is as interesting for you as it is for me.
Feel free to contact me through my social media to ask more about my setup or precision over the steps to make the Raspberry Pi ready.
![]()